Page 3

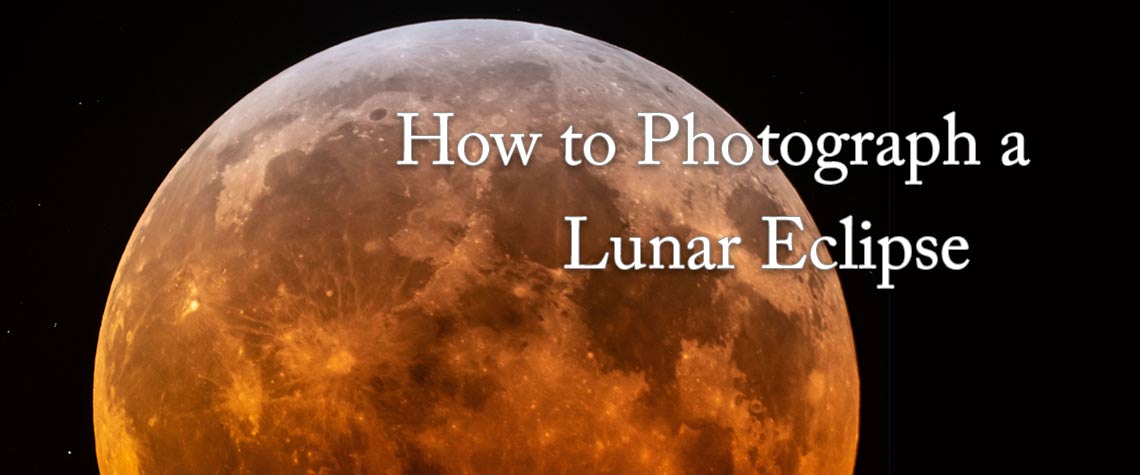
Astrophotography Lesson - Photographing the Super Blood Wolf Moon Eclipse
Article and Photos by Randall Light, M.D.
Email: randylightmd@yahoo.com
Website: www.randalllight.com
On January 31, 2018 there was an eclipse of a rare Super Blue Blood Moon. This was the topic of an article for this
spring 2018 newsletter.
It was an early morning eclipse and it was very cold. It occurred near the horizon.
The 2019 Lunar Eclipse
This year the conditions and options were better. On January 20, 2019 the night was clear and cold. Club members gathered at Regina Caelorum Observatory to observe and photograph an eclipse of a Super Blood Wolf Moon. Totality was at about 11:12 pm. The totally eclipsed moon was at an elevation of about 68 degrees and provided an excellent view of the eclipse.
With close to ideal conditions, I made plans to take advantage of several options to photograph this eclipse.
Astro-Tech AT10RCT Telescope and Nikon D850 DSLR
First, a set of detailed images would be obtained with a Nikon D850 DSLR through my Astro-Tech AT10RCT with a .75 telecompressor and a focal length of 1640 mm to document the eclipse at intervals of one minute from the beginning of the partial eclipse until the eclipse ended just over three hours later.
- Individual images would be used alone or in one or more collages.
- The entire set of images would also be reduced in size and combined into a time-lapse video of the eclipse.
70-200 mm Telephoto Lens and Nikon D810A Camera
Second, there was the opportunity to take a moderately wide field image covering about 10 degrees of the sky to include the totally eclipsed moon and the Beehive Cluster, M44.
- This could be done with a Nikon D810A and a 70-200 mm telephoto lens mounted on top of the telescope.
20mm wide field lens and Nikon D810 Camera
Finally, there would be the opportunity to photograph the eclipse as it took place over the observatory.
- A Nikon D810 with a 20mm wide field lens would be placed on a tripod behind the observatory.
- A photo of the observatory at nautical twilight would produce a deep blue sky and serve as the foreground image for a collage.
- Images exposed for the various phases of the eclipse would be taken at ten minutes intervals.
- Selected images would be combined with the observatory image to show the progression of the eclipse above the observatory.
Planning the Exposures
Next, it was important to plan the exposure for each phase of the eclipse including how much to bracket the exposures, and how to automate the exposures as much as possible. With three cameras taking pictures there would not be time to make frequent adjustments. Fortunately, there are excellent resources available to help with this planning. Fred Espenak, aka Mr. Eclipse, has a table of excellent suggested initial setting on his website.
These were reviewed and used to select the exposures for the various phases of the eclipse. The “Lunar Eclipse Exposure Guide” and my preferred setting highlighted in yellow are shown in Fig. 1. The time during the eclipse that the specific setting was added to the left side of the page. Each exposure was bracketed plus and minus four stops to optimize the images. The camera was set to photograph the necessary exposure sequences at the correct intervals. Manual exposure changes were made as the eclipse progressed. A schedule was established for each camera. Alarms were set on my phone when changes needed to be made. Raw images were obtained. I estimated taking 2000 50 MB images for a total of 100 GB. The available memory cards in the D850 were adequate to store all of the images.
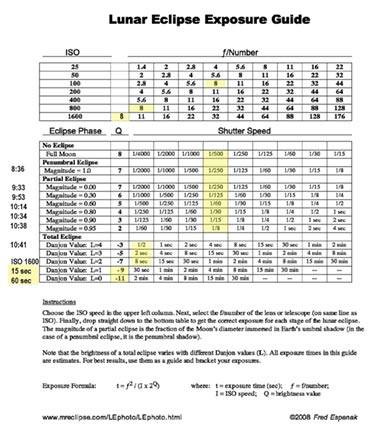
Figure 1
Click to enlarge.
The Big Day Arrives
On the day of the eclipse I arrived early to set up well before the eclipse. Exposures were made of the full moon. Each camera was programmed to take the planned sequences. The sequences were started a few minutes before the partial eclipse began. Adjustments were made at the planned times. The telescope mount was placed in lunar tracking mode but still needed periodic adjustment to keep the moon center. The exposure of the fully eclipsed moon and M44 was made on schedule. The framing of the image taken by the wide field camera was adjusted once. The images were monitored throughout the eclipse. Images were taken until the eclipse ended. By the time all of the equipment was put away frost was forming on the legs of the last tripod behind the observatory. It was time to warm up and get some sleep.
Processing the Images
The next phase of photographing this eclipse started the following day with sorting and processing the images to be used individually, in the time-lapse video, and in two collages. Processing was done with Photoshop CC 2019. The results follow.
Fig. 2 is an image of the totally eclipsed moon made through the telescope with a five second exposure, ISO 800, and f/2.8 to illustrate the deep orange color of the moon at totality.
Figure 3 shows the totally eclipsed moon on the right and M44 on the left. The image was made with a 70-200 mm lens at 70 mm, an eight second exposure, ISO 1600, and f/2.8. The moon and M44 are separated by about 6.6 degrees. The field of view is about 10 degrees.
The baseline photo of the observatory at nautical twilight was combined with selected telescope images illustrating various phases of the eclipse in Fig. 4. Placement was guided by the position of the moon in the wide field images. The Orion constellation is also visible.
Telescope images just before, during and just after totality were combined to create the image in Fig. 5. Settings were a five second exposure, ISO 800, and f/2.8.
Time-Lapse Video
Finally, a time-lapse video of the whole eclipse using 180 images taken through the telescope was created. That video can be seen here.
In conclusion, this lunar eclipse provided the opportunity to make several different types of images and a time-lapse video. Careful planning, reliable exposure suggestions, and a timed schedule were essential for a successful imaging session with multiple cameras.
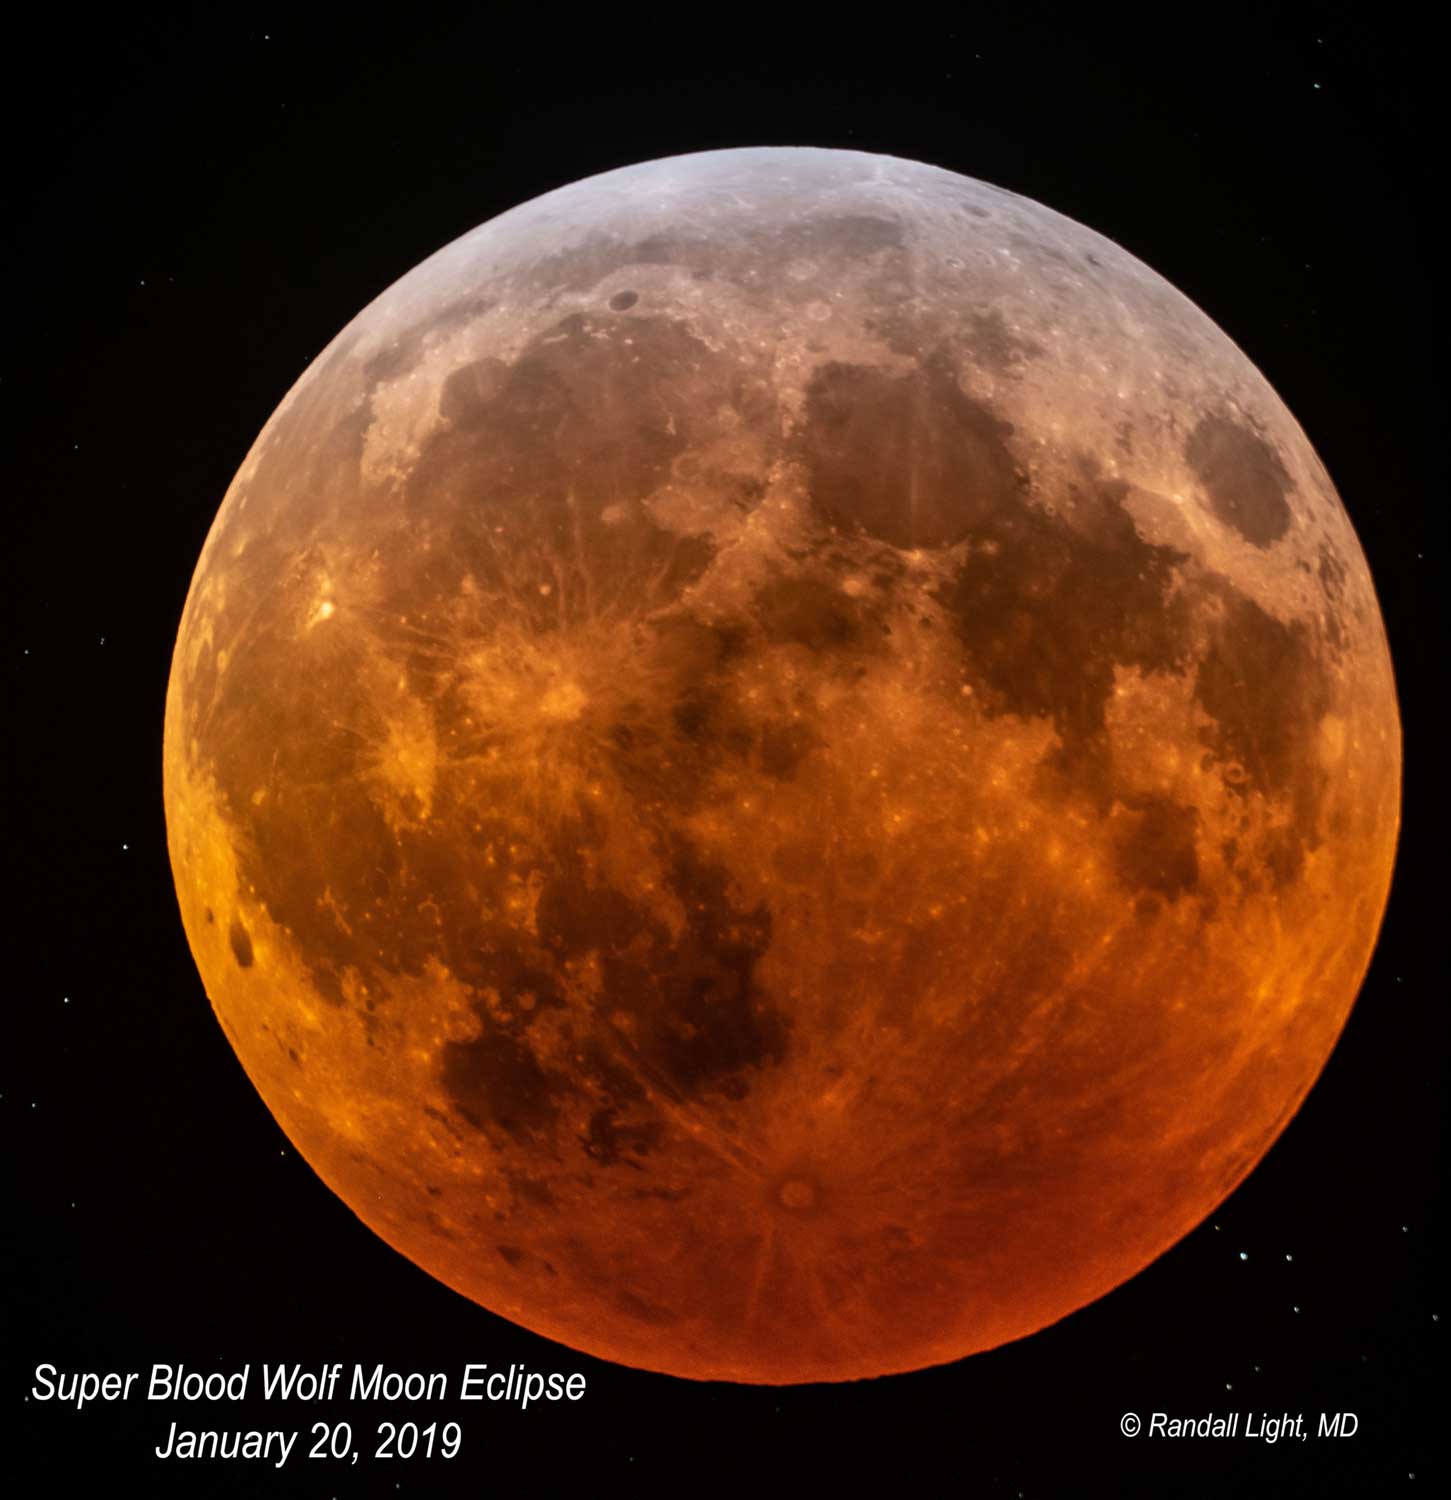
Figure 2. Totality
Click to enlarge.
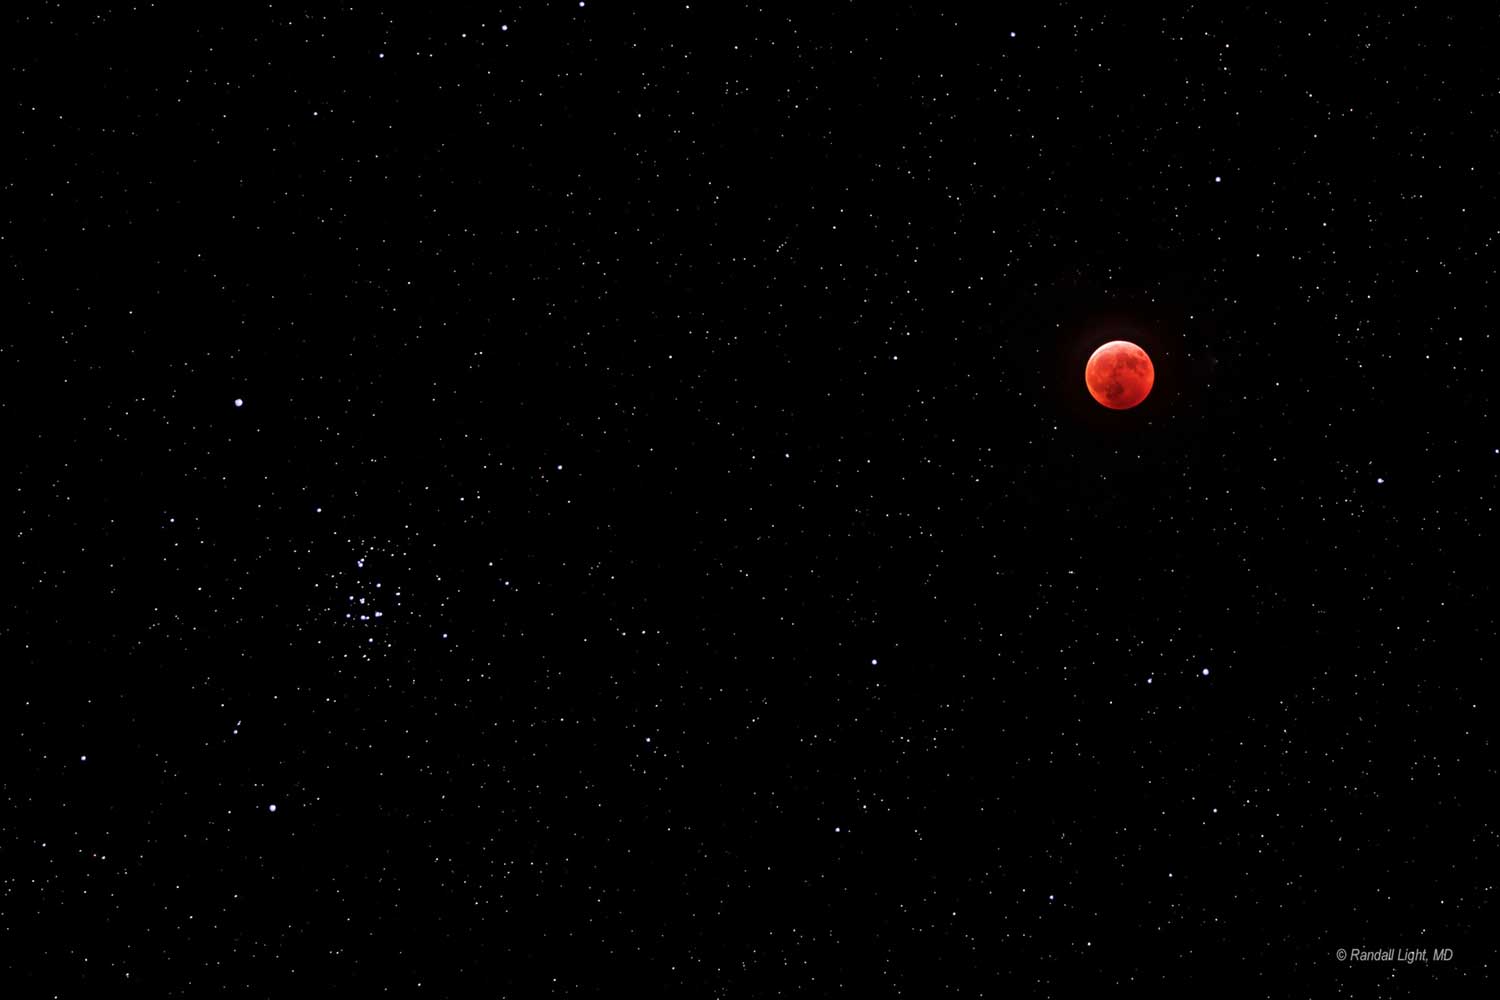
Figure 3. Totally eclipsed moon and M44
Click to enlarge.

Figure 4. Regina Caelorum Observatory
with the eclipse sequence shown overhead
Click to enlarge.
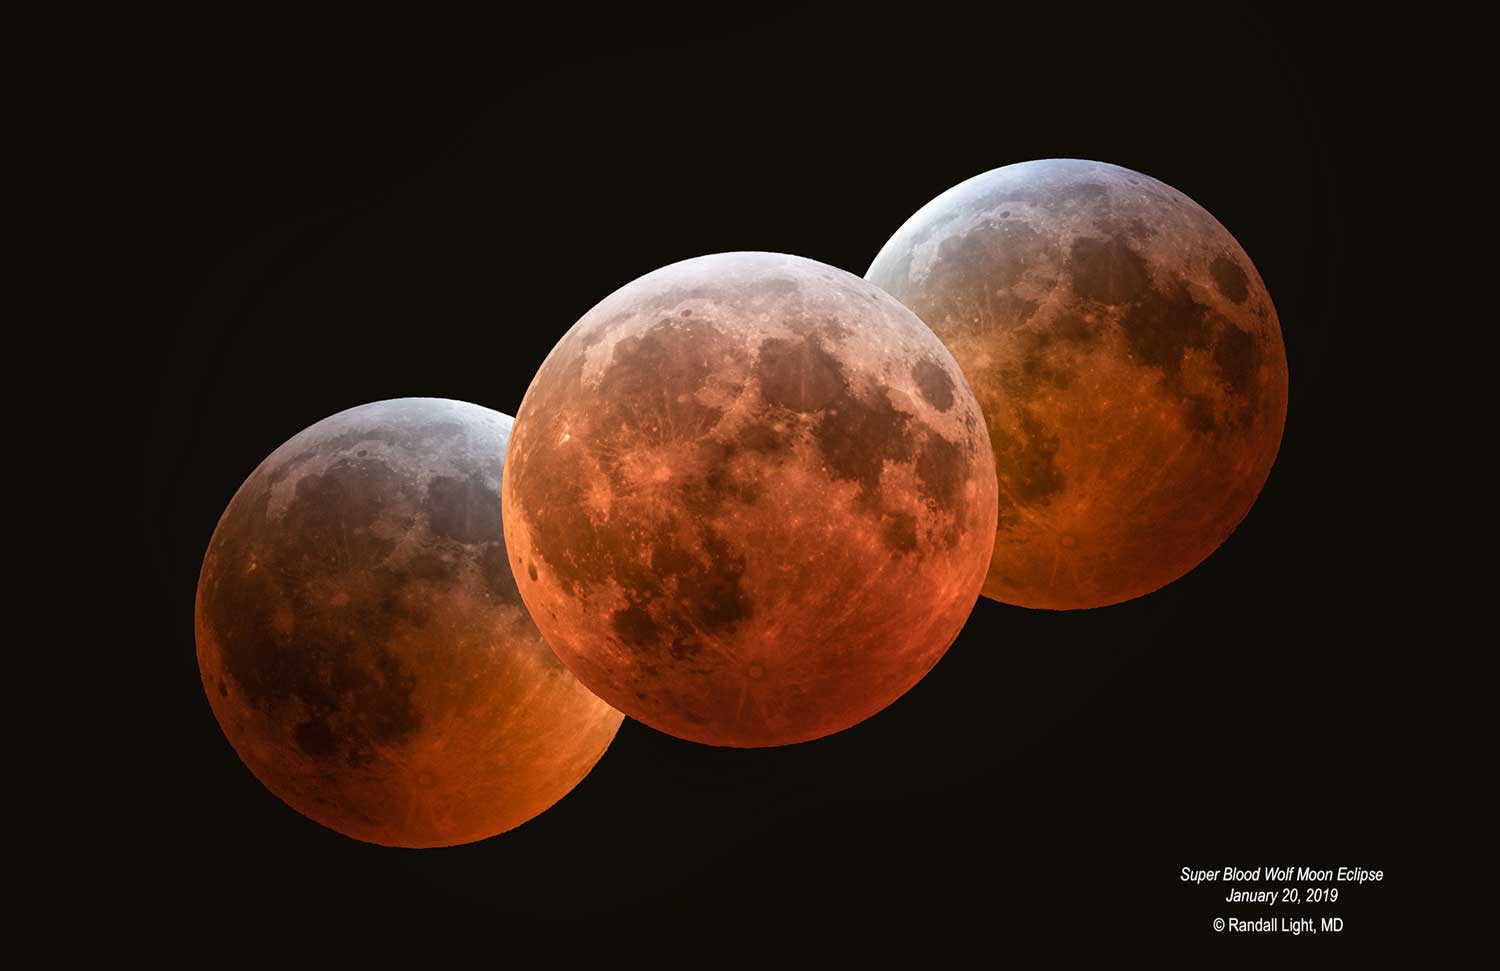
Figure 5. Eclipse Collage
Click to enlarge.
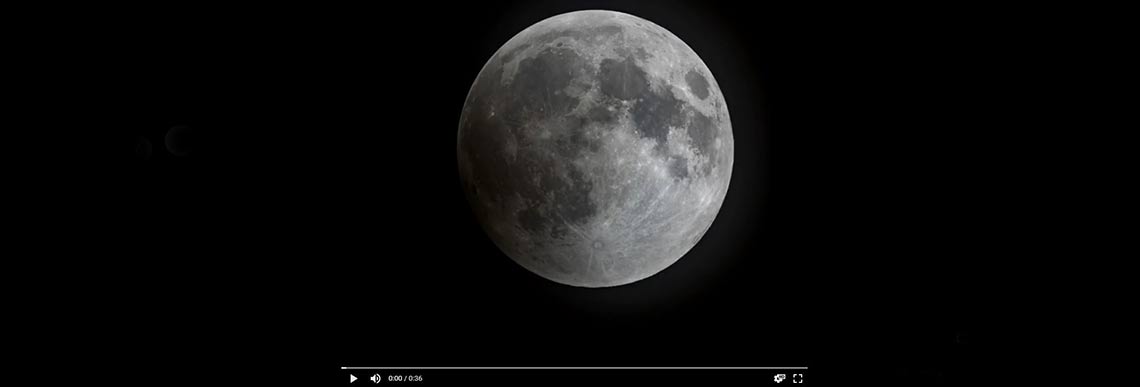
Time-lapse video
Click the moon to start video.
All 2019 lunar eclipse images and the time-lapse video can be seen on Dr. Light's website on the 2019 Lunar Eclipse page.