Page 7

Measuring Height of Lunar Features
By Don Carona
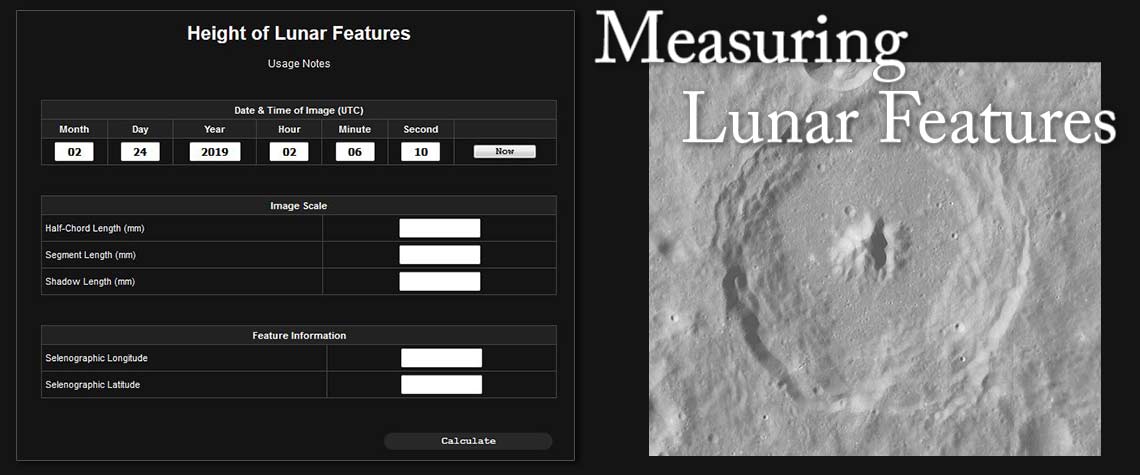
The Height of Lunar Features web application can be found at:
- Applications-->Solar System-->Moon-->Lunar Heights
- The URL is http://doncarona.tamu.edu/apps/moon/heights/
From April 1984 through February 2002 Sky & Telescope magazine published a regular article, “Computers in Astronomy,” which included programming code written in BASIC to coincide with the article. The January 1985 article, How High Are Lunar Mountains?, was very intriguing to me. After all, one of my favorite observing targets is the Moon. I can gaze over the lunar terrain for hours through my refractor while I look up some of the features that I see in my lunar atlas. The idea of a fun project to determine the height of features was something I couldn't resist trying out. To spare the suspense, the project went well and I was able to truly understand the scale of some amazing lunar features using my father's Olympus SLR camera and telephoto lenses and my second-hand Macintosh 512K.
The Original Project
If you don't have access to the original article, the idea is that you take a photograph of the Moon when shadows are cast by the features of interest. The photograph, or a second photograph if necessary, needs to include a section of a lunar limb (edge) for scale. Develop the photograph and print as 5 x 7 or larger. Then, determine these input parameters for the program: half-chord and segment in millimeters, length of the feature's shadow in millimeters, the selenographic coordinates of the feature, the selenographic sub-coordinates of the Earth, the selenographic sub-coordinates of the Sun, and finally the selenographic colongitude of the Sun (morning terminator). Note that you have to know the date/time of the photograph in order to get the sub-coordinates of the Earth and Sun as well as the colongitude.
Definitions:
- The half-chord a.k.a. (half-height chord) is a line drawn from one section of the lunar limb to another with a mark at the halfway point.
- The distance along this line from the limb to the halfway point is the half-chord.
- The segment is a line drawn perpendicular from the half-chord point to the lunar limb.
Note: The longer the chord line the better as the program uses these two measurements to determine the scale of Moon in the photograph.
Examples of these measurements are annotated on the companion image below. Any lunar atlas will help with determining the selenographic coordinates of the feature. The selenographic sub-coordinates of the Earth and Sun and the colongitude can be taken from an astronomical almanac.
The Current Project
Since it's been so cloudy, I decided to try the project again using photos of the Moon that I took with my wife's Nikon D5100 (DSLR) over the years and ran into some road blocks. First, BASIC is a mostly dead language today. Even Microsoft stopped including BASIC and QBasic in its operating systems after Win98 (I think). Technically, you can still run them in MS Excel as a macro with some effort and if you're brave. Second, astronomical almanacs are great for quick reference, but the sub-positions of the Earth and Sun are constantly changing. Almanacs give the coordinates for a given day, which is fine, but the results of this calculation will be a slightly lower accuracy. Third, it's much faster and easier to open a digital image in an image viewer application to take the necessary measurements.
To make life easier, I ported the BASIC code to Swift and expanded it to determine the sub-positions and colongitude based on the date/time of the photograph. Then, I created a web-based interface, which includes a lunar atlas for determining the selenographic coordinates of features. This is all found on the application page noted at the top of this article.
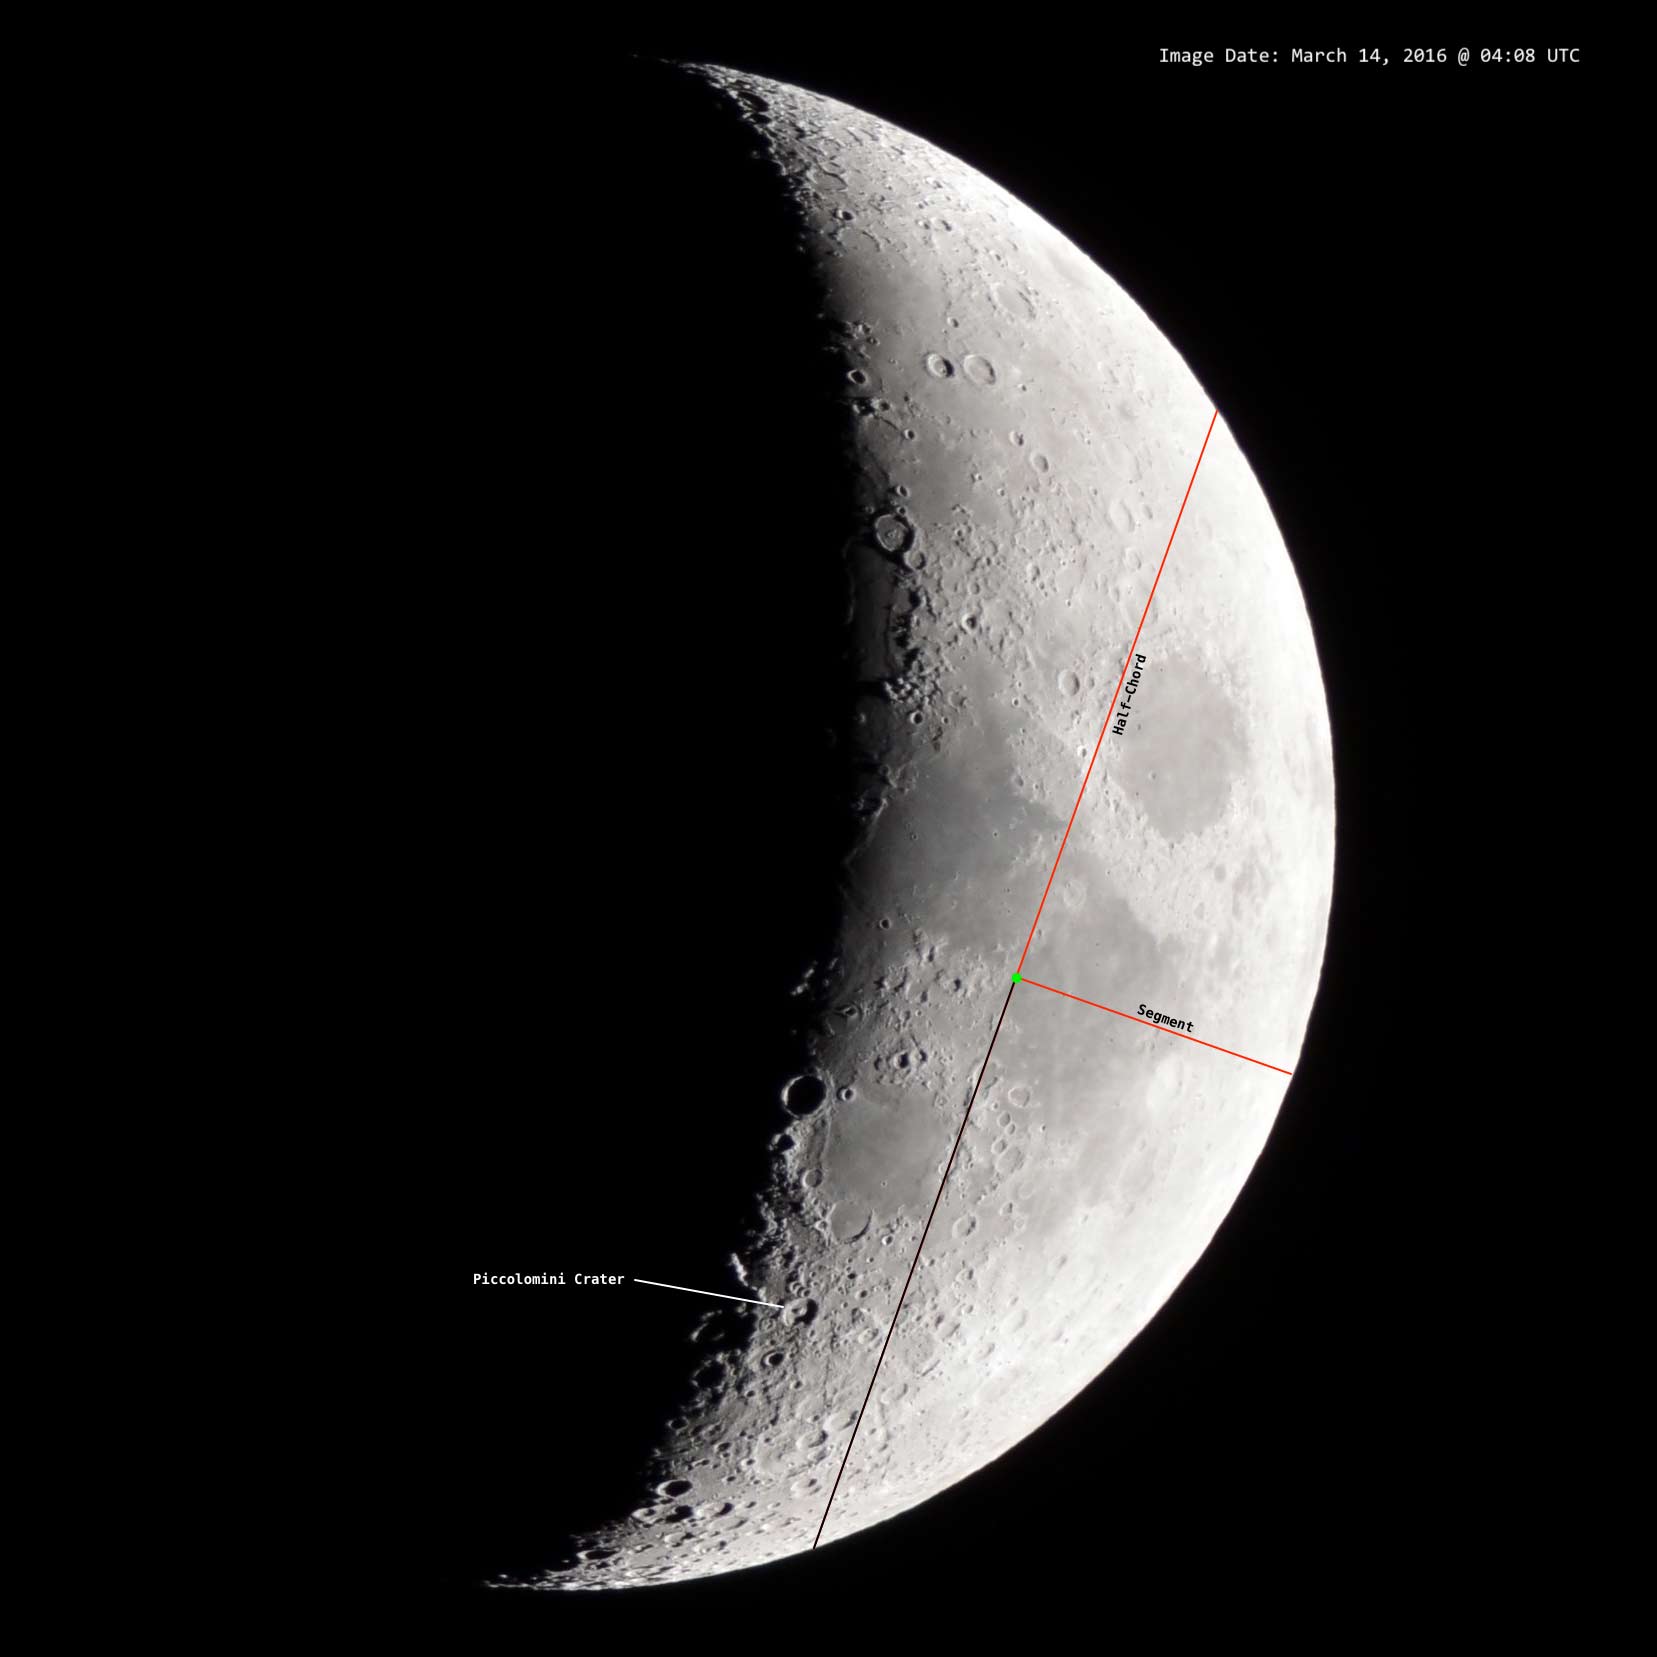
Measuring Piccolomini Crater
Crater - Segment - Half-height Chord
Click the image to enlarge
A Word About Measuring Digital Images
If you're not going to print your image of the Moon, you'll need some means of measuring the pixel distance. Any image viewer application that displays the XY position of the cursor over the image is fine. You cannot use the pixel distances for the program since the size and number of pixels in an image are device dependent and the results will be incorrect. Instead, you'll need to convert the pixel distances to millimeters. To make the conversion, you need to know how many millimeters are in a pixel for a given image and to know that, you have to find the “resolution” or “dpi” of the image. Most image applications have some means of showing this information. The resolution of the companion image is 72 pixels/inch, which is then converted by: 25.4 / 72 = 0.35278 mm/pixel.
If your image application doesn't have a measuring tool but does show the XY position of the cursor within the image, you can use the cursor to note the position for the start (X1, Y1) and end (X2, Y2) positions of each line. Calculate the length the line by: SQRT( (X1 - X2)2 + (Y1 - Y2)2 ). You might find it much easier to use the drawing tool to mark your lines and then use the cursor to note the start and end points for measuring.
Measuring a Shadow
If you print an image, measuring a shadow with a ruler can best be accomplished using a magnifying glass so that you accurately measure the complete shadow without including the sunlit portion of the feature. If using an image viewing application, zoom in on the feature for an accurate measurement. It's important to follow the direction of the shadow when measuring to accurately trace the sun angle. I measured the length of the shadow of the central peak of Piccolomini crater (pictured right) to be 6.0 pixels = 2.11 mm.
Measuring the length of Piccolomini crater shadow
Putting it All Together
- Visit the web page for the Height of Lunar Features application.
- Enter the UTC date/time for the companion image (2016-03-14T04:08).
- Enter the half-chord length of 212.9 mm, the segment length of 103.22 mm and the shadow length of 2.11 mm for the central peak (ejecta cone) of Piccolomini crater.
- Next, scroll down the page to reveal the lunar atlas.
- Once you've found Piccolomini crater, click on the central peak. This will add the selenographic coordinates of the feature to the feature information section of the application form.
- Click on the “Calculate” button to produce the results.
Results
My measurement shows the height of the central peak to be 6699.9 ft or 2.04 km. The accepted height of this feature is 2.0 km, which is confirmed by the length of its shadow!
Image credit - Piccolomini Crater in banner at top of page: NASA / LRO_LROC_TEAM [Public domain]