

By Dharma Teja Paladugu
Milky Way season is here. The arrival of March means the first sight of the Milky Way during the Northern Hemisphere pre-dawn hours. To get on with your sky safari this Milky Way season, here is a mobile application that can assist you in planning days ahead. Yes, I am talking about Photopills. This is a paid application ($10.99 on App Store) on both Android and iOS.
From my experience, it is a very useful tool for all levels of astrophotographers. This tool has a whole section of tutorials aptly called "Academy" which honestly is overwhelming with the number of things you can do using this application. It is such a powerful tool. For example, it helps in calculating exposure levels to avoid star trails for your particular camera and lens. How cool is that? The planner option which I will discuss in detail next is another wonderful feature, especially when planning to shoot in a new location. Imagine trying to figure out your composition at the delicate arch of Arches National Park while winding down at the end of the day in New York City.
This article is to get you started with the application before you dive into numerous features as you go pro. Here I shall provide a brief tutorial to capture the Milky Way at a location near Bryan, Texas. Let's dive into it.
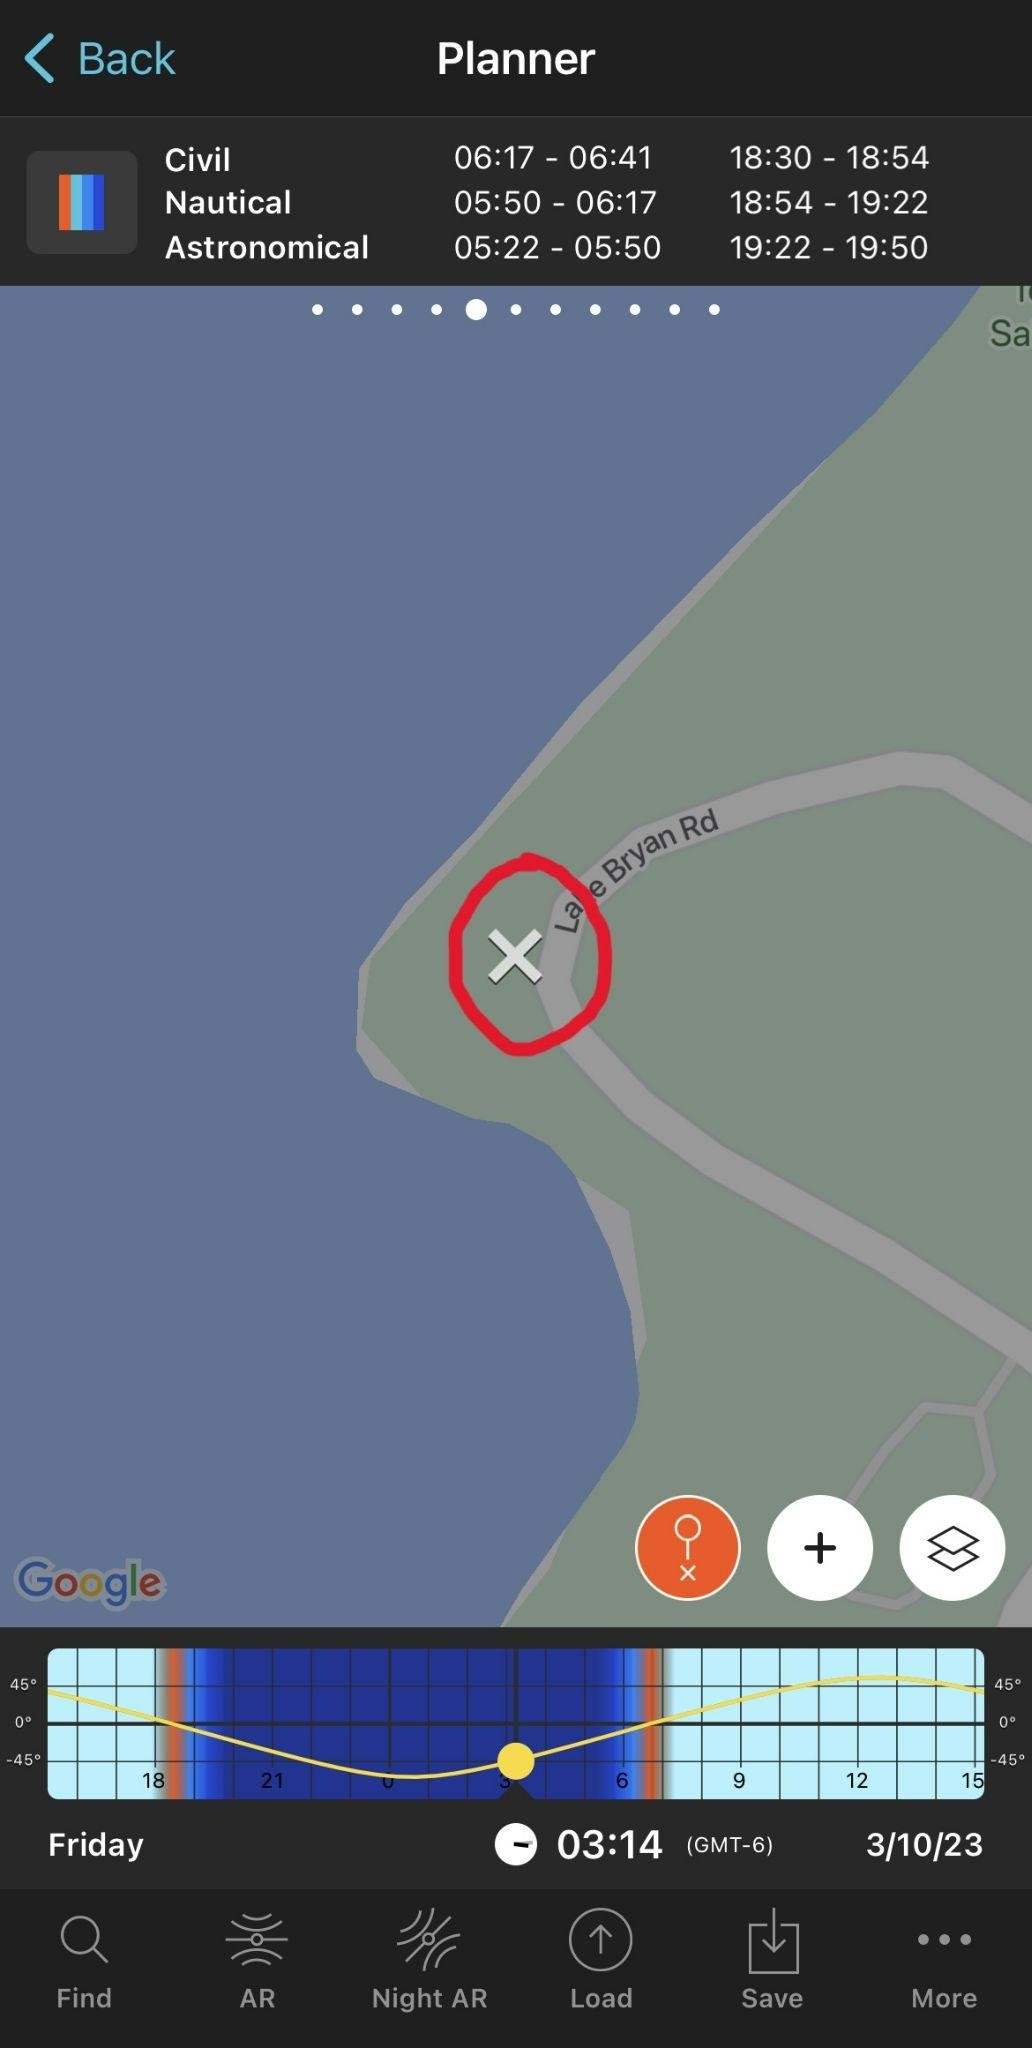
First, you need to travel, virtually, to your dream location. The best way to do this is to use the pin feature as shown below. After selecting the location pin (as shown in the second picture) you need to pinch the map to zoom out, swipe to your location, zoom in and tap on the "X" to set the location. Congrats you are now at your dream location to capture the Milky Way.


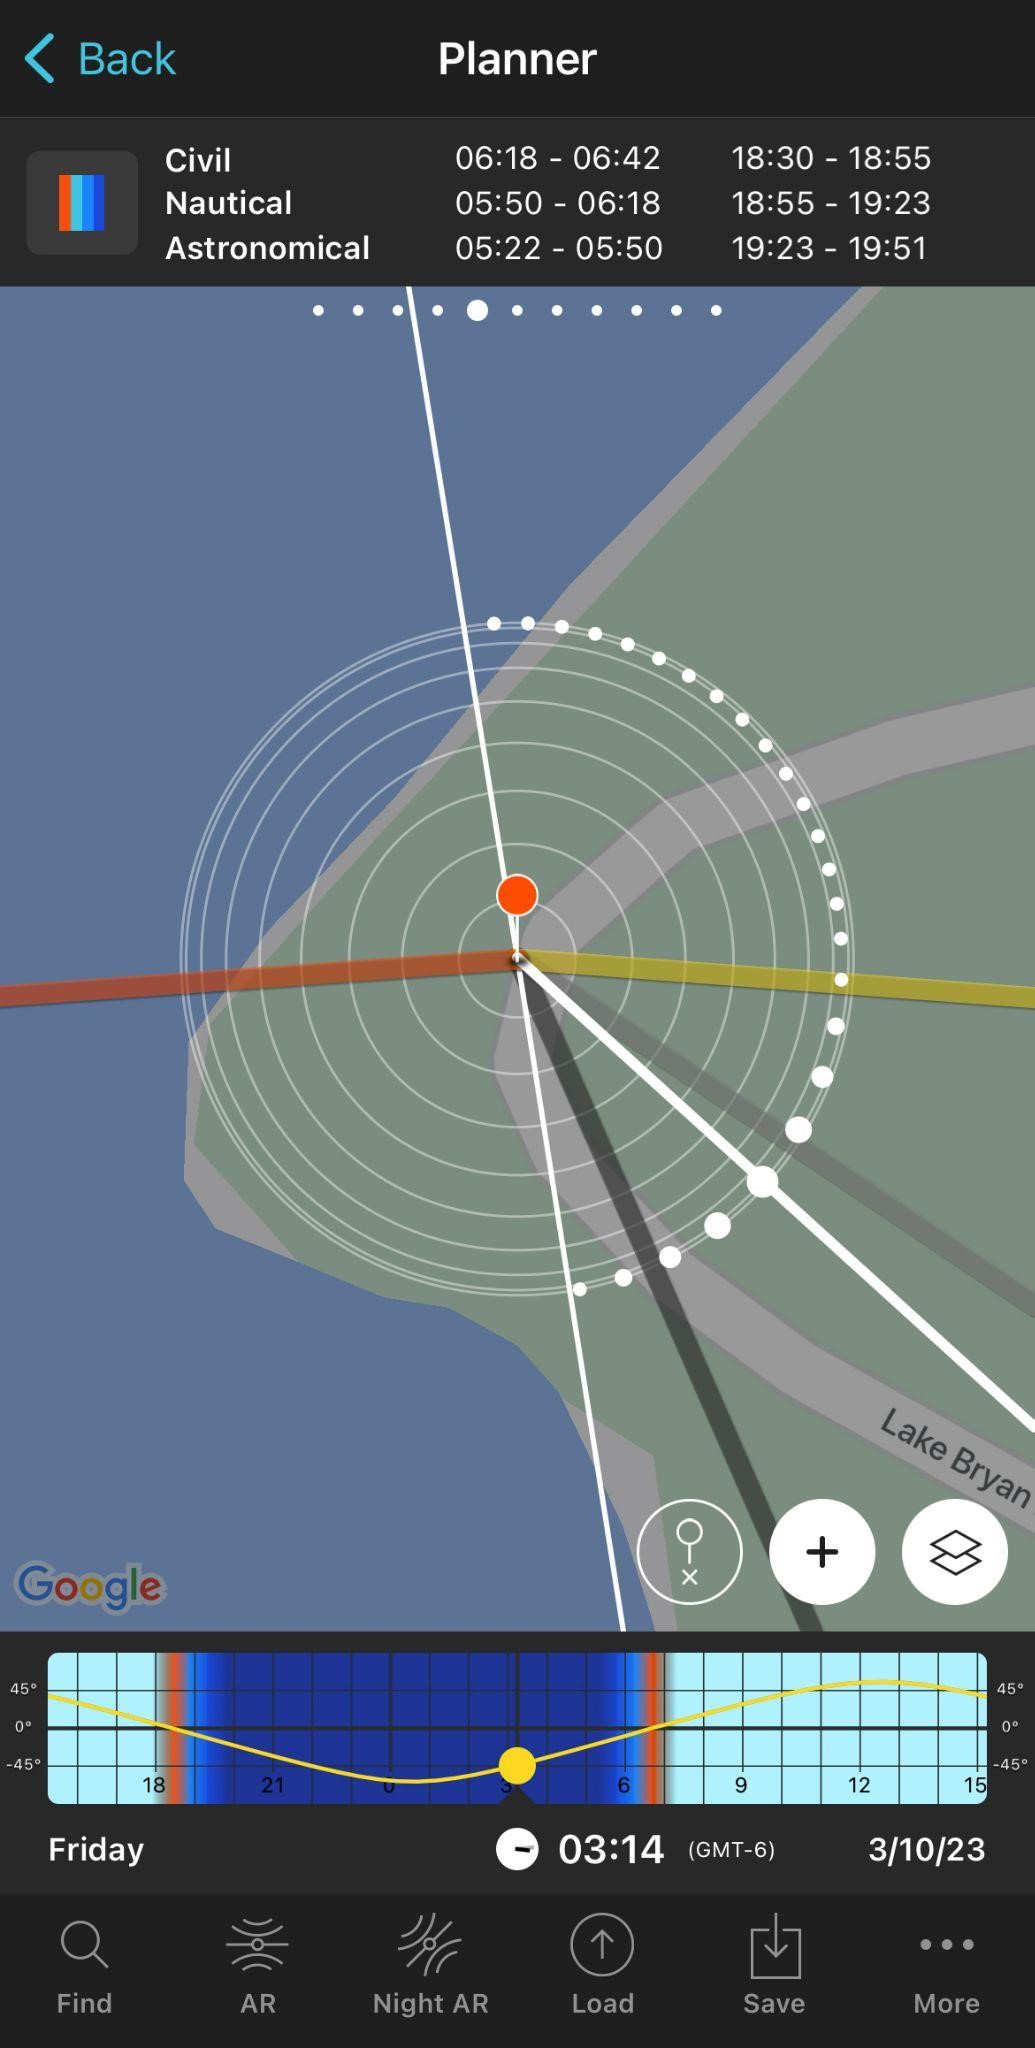
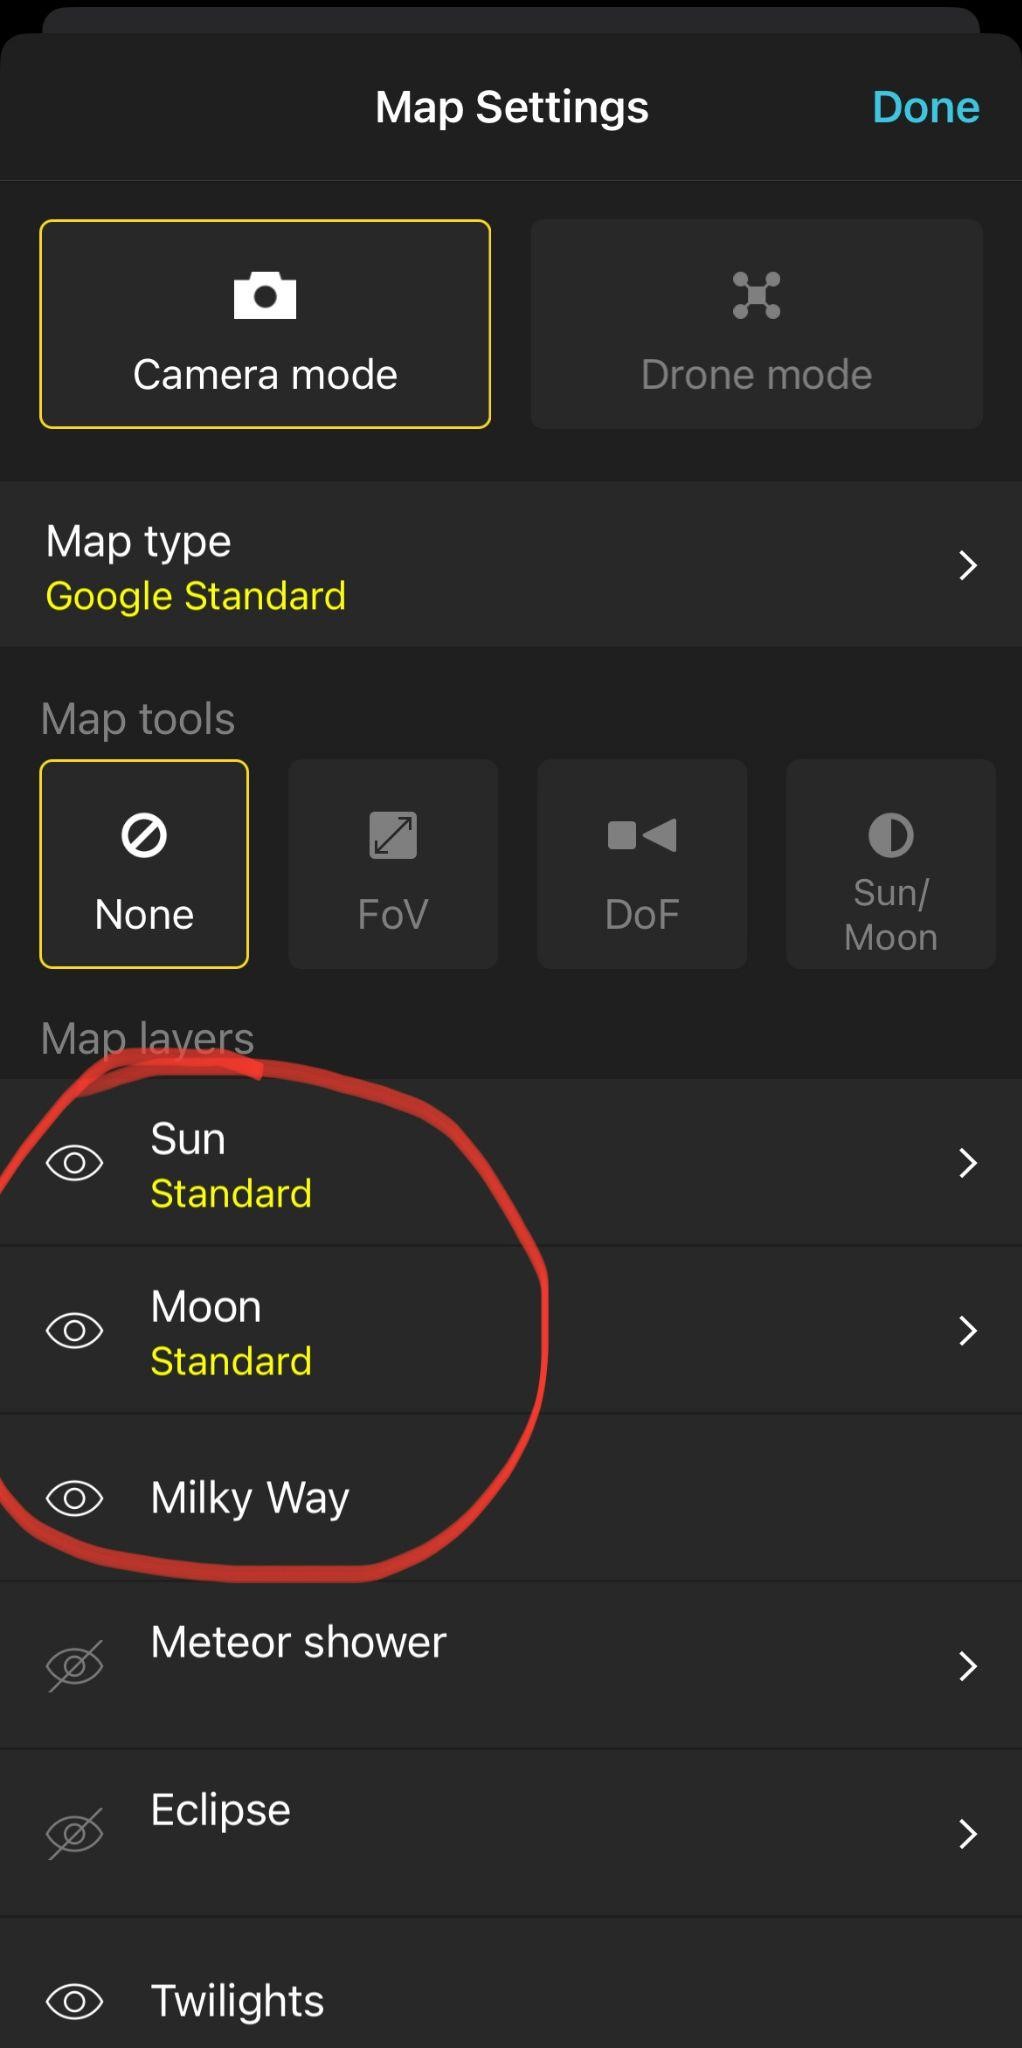
There are some party poopers for Milky Way photography. Usually, we go in search of a dark site but forget about the sun and moon rise/set times. Starting in March, the Milky Way rises a few hours before sunrise. As we move towards Summer, the moon becomes an important factor. In this app, we need to turn on these sun and moon layers to make sure they are not in our way for Milky Way photography. Select the three layers as shown below. I will discuss more about these in the next sections but for now, turn them on and move to the next section.

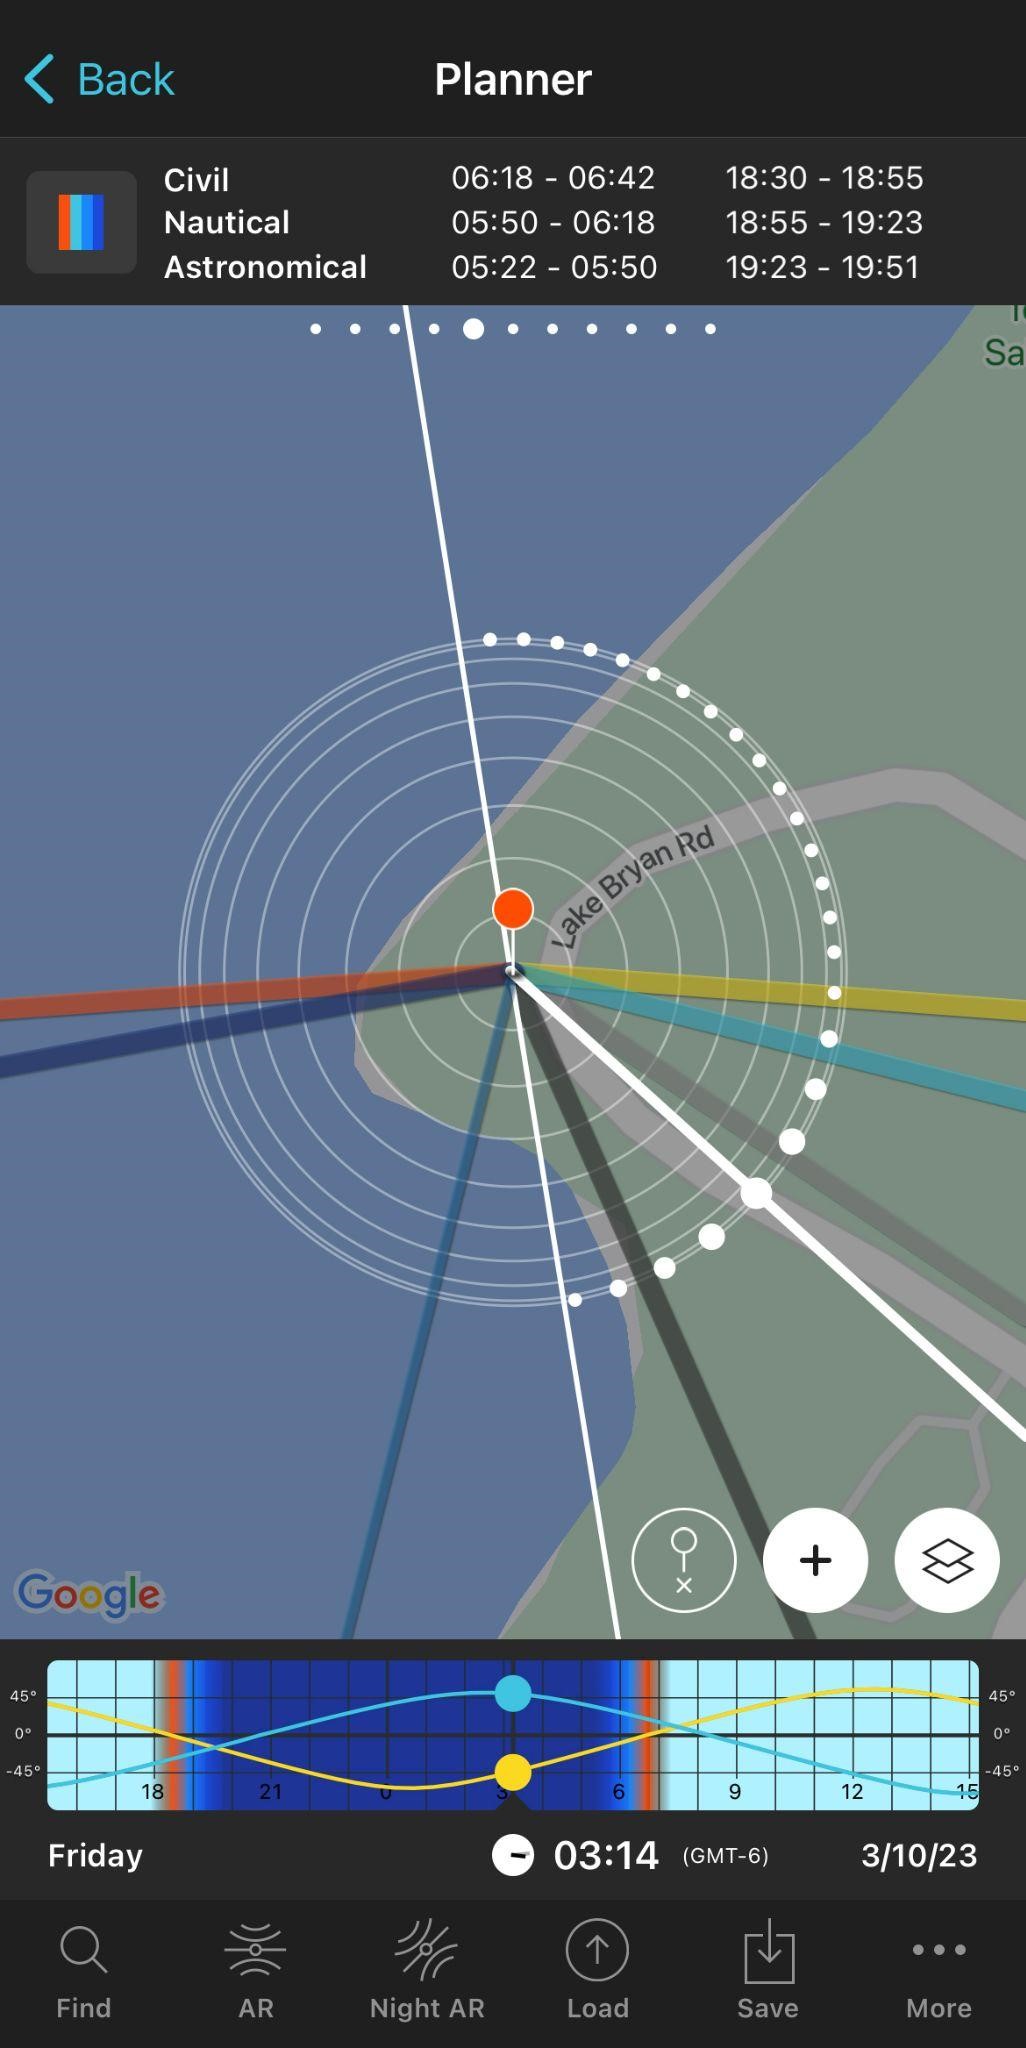
Living in a flat land region like Bryan, it is important for the objects in sky to get higher up in the sky. Otherwise, they get lost in the city lights at the horizon. The outermost circles shown in the screenshot below indicate the horizon and the inner circles indicate moving higher in the sky as you move inwards. By trial and error, figure out the Milky Way's location in the circles and observe where it is in the sky to understand the correlation between the circles and location in the sky. Generally, at higher elevations it is easier to capture objects at outer circles compared to locations at lower elevations.
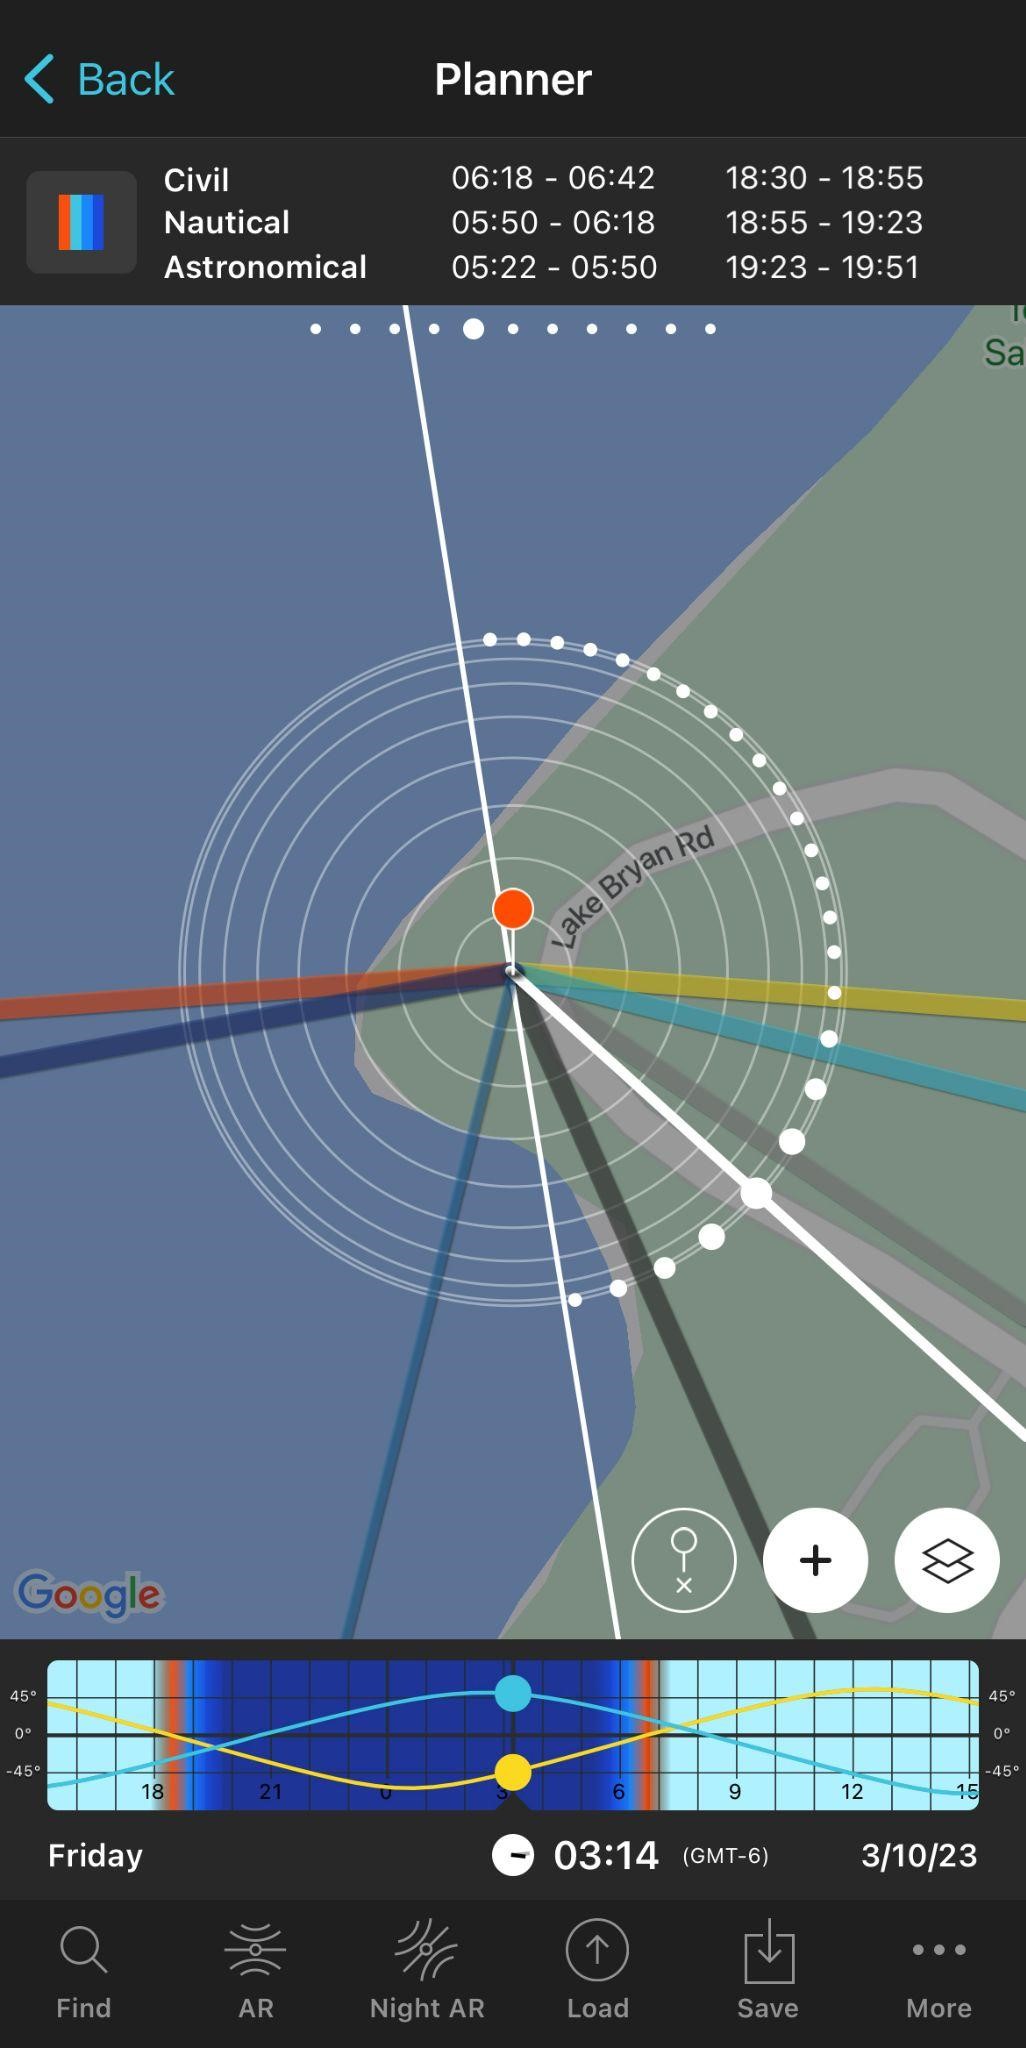
Now, we arrive at the interesting part. As you hold the hour chart at the bottom of the screen and swipe left or right you move along the time. The dark blue region indicates nighttime. As you keep moving along the time, you observe that the Milky Way (represented by a series of dots on the altitude circles) also moves. It is important to note that the thickest of the dots is the core of the Milky Way.
In March, the core rises during pre-dawn hours and it slowly rises earlier in the night as the year goes by. By October it rises and sets during the day making it the end of the Milky Way season in the Northern Hemisphere.
Although you can see the Milky Way throughout the year, the most significant and most beautiful part of the galaxy is the core. The other side is not so prominent to form a dust-like pattern among other stars in the sky which makes it important to catch a glimpse during March-September.
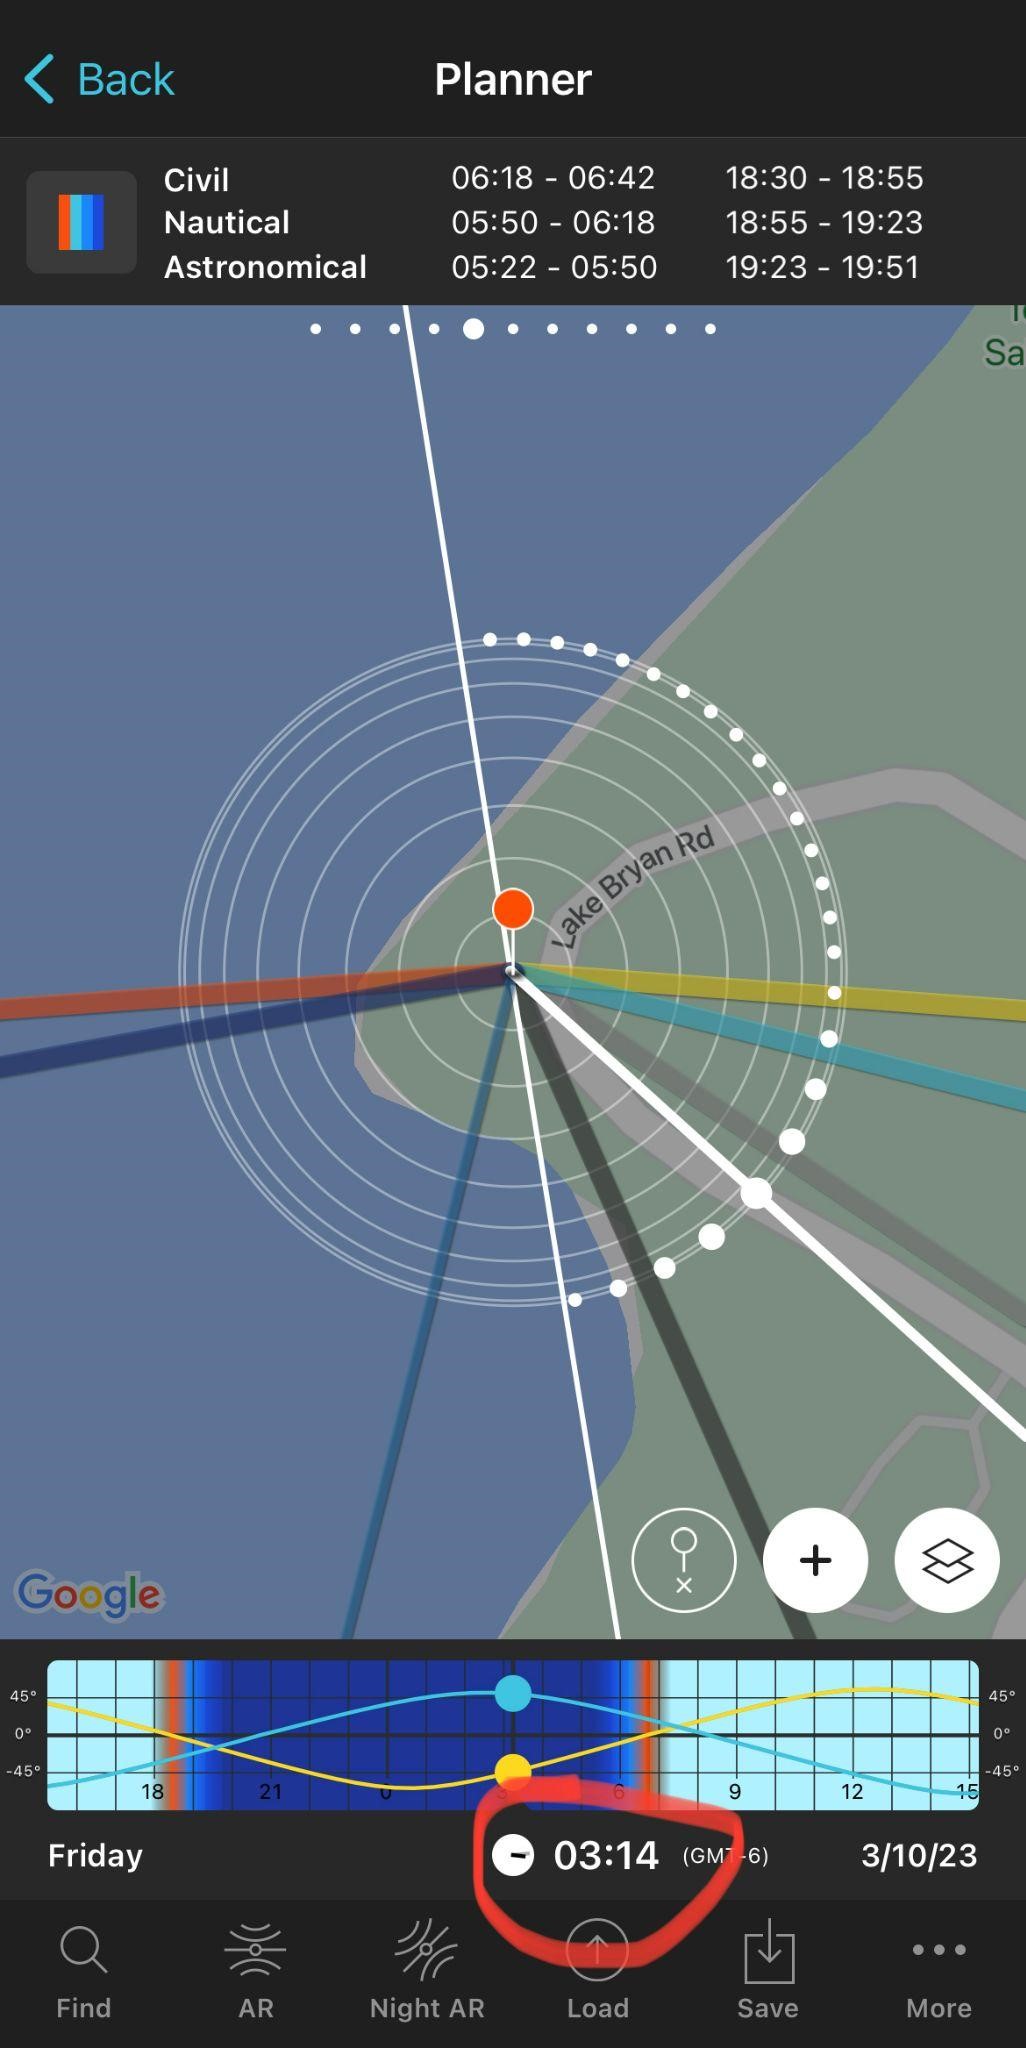
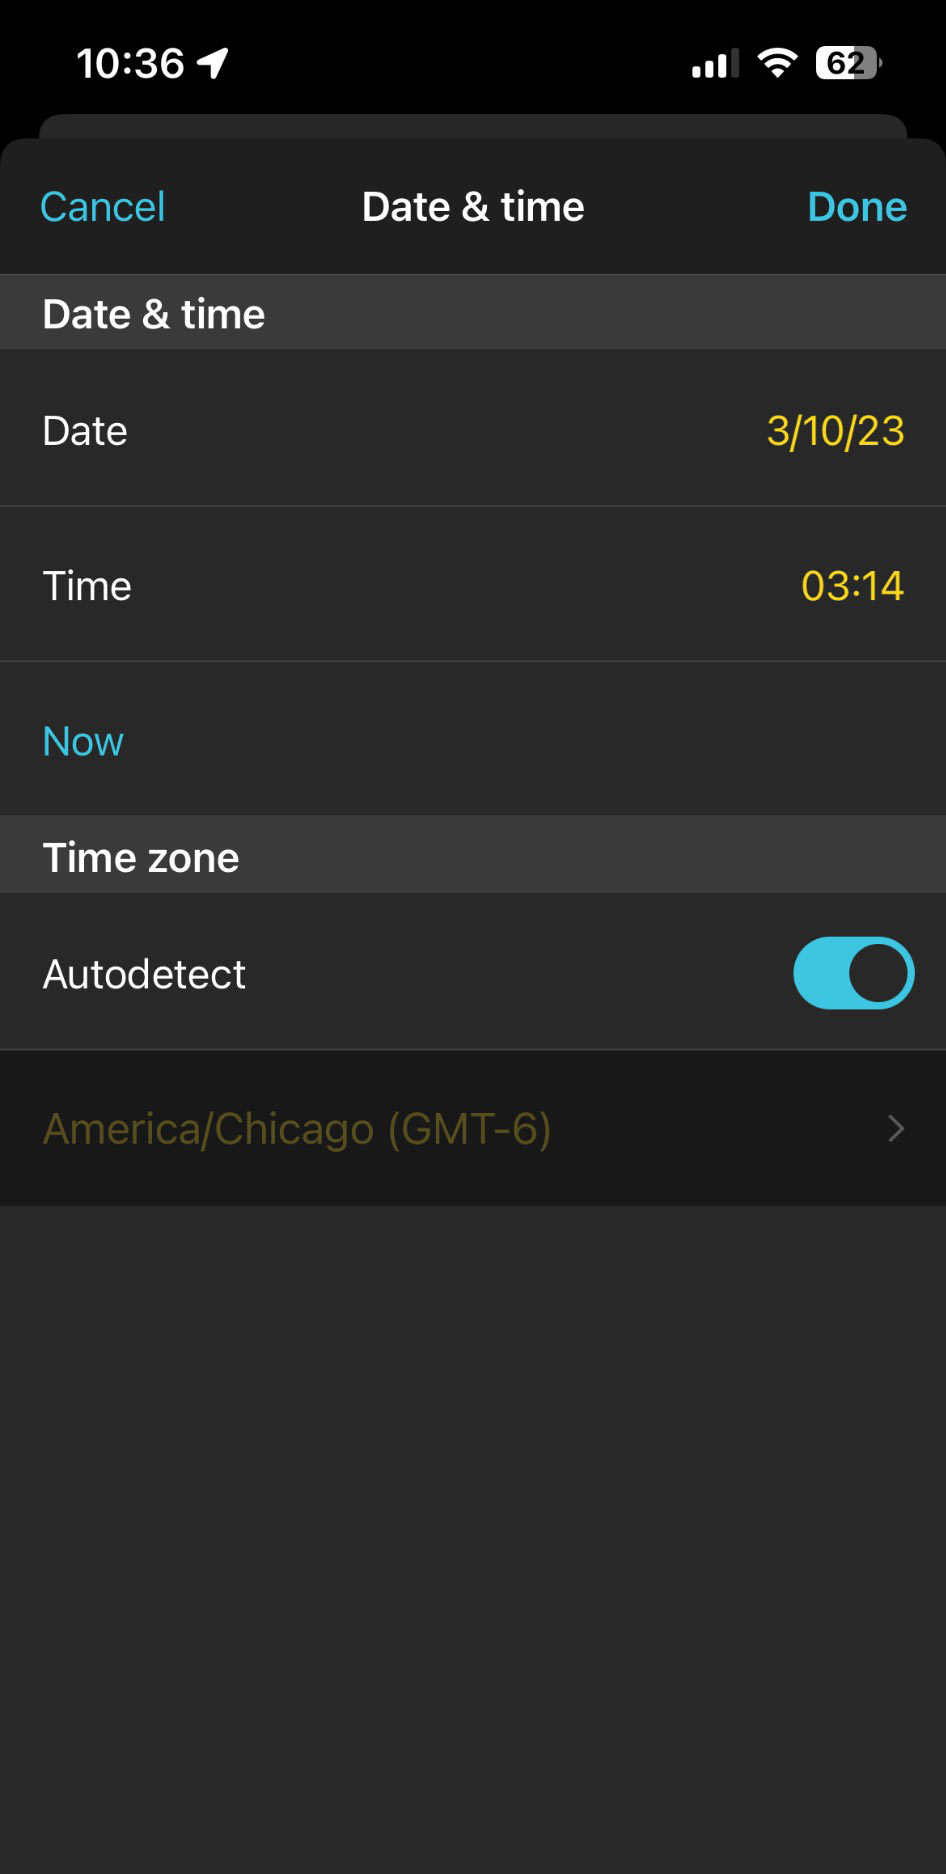
After setting up the location and figuring out the details of the Milky Way, it is now time, literally, to pick a date with the most beautiful part of the sky. Simply tap on the clock at the bottom of the screen and select the date and time.
The key thing when choosing the date and time is to observe the sun and moon's path. Ideally on a new moon midnight is the perfect choice. However, there may be cloudy skies which is such a put-off for any astro enthusiast. Given how the moon starts rising late after a full moon and a few days after a new moon, the entire 15-day window between a waning gibbous moon and a waxing gibbous moon is perfect.
By swiping the time like you did in Step 4, observe the moon's location and make sure it is still below the horizon during the time you capture the Milky Way. The sun becomes important only during March-April (maybe May) when the Milky Way core rises during pre-dawn hours.
You have your location, date, time, and direction to capture our galaxy's core. Depending on your camera lens, take multiple sets of photos by changing exposure, and ISO. It is difficult to judge the image quality on a tiny camera screen. Usually, 10 photos of the same setting are good enough to get a noise-free image after post-processing. If you have a foreground, take exposure shots in the order of minutes depending in the lighting on the foreground.
These are all the important tips and helpful directions to capture the Milky Way. Here I will end with a few extra tips before you head out.

The Milky Way taken close to Lake Bryan in Bryan, TX
Good luck on your sky safari!

About the Author:
Dharma is a PhD student in the Electrical Engineering department at Texas A&M University, College Station. He is also the Secretary at Brazos Valley Astronomy Club. His interests are astrophotography and landscape photography.
Website: https://www.DharmaPaladugu.com/

Spring 2023 Newsletter